What this does
Adding a company creates a full client record. You get a place to keep their documents, raise invoices, track compliance, and more. It also creates a login account for the owner, which you can activate now or later.
Use this when you are onboarding one client. To bring in many clients at once from a spreadsheet, see How to import several companies at once.
Add the company
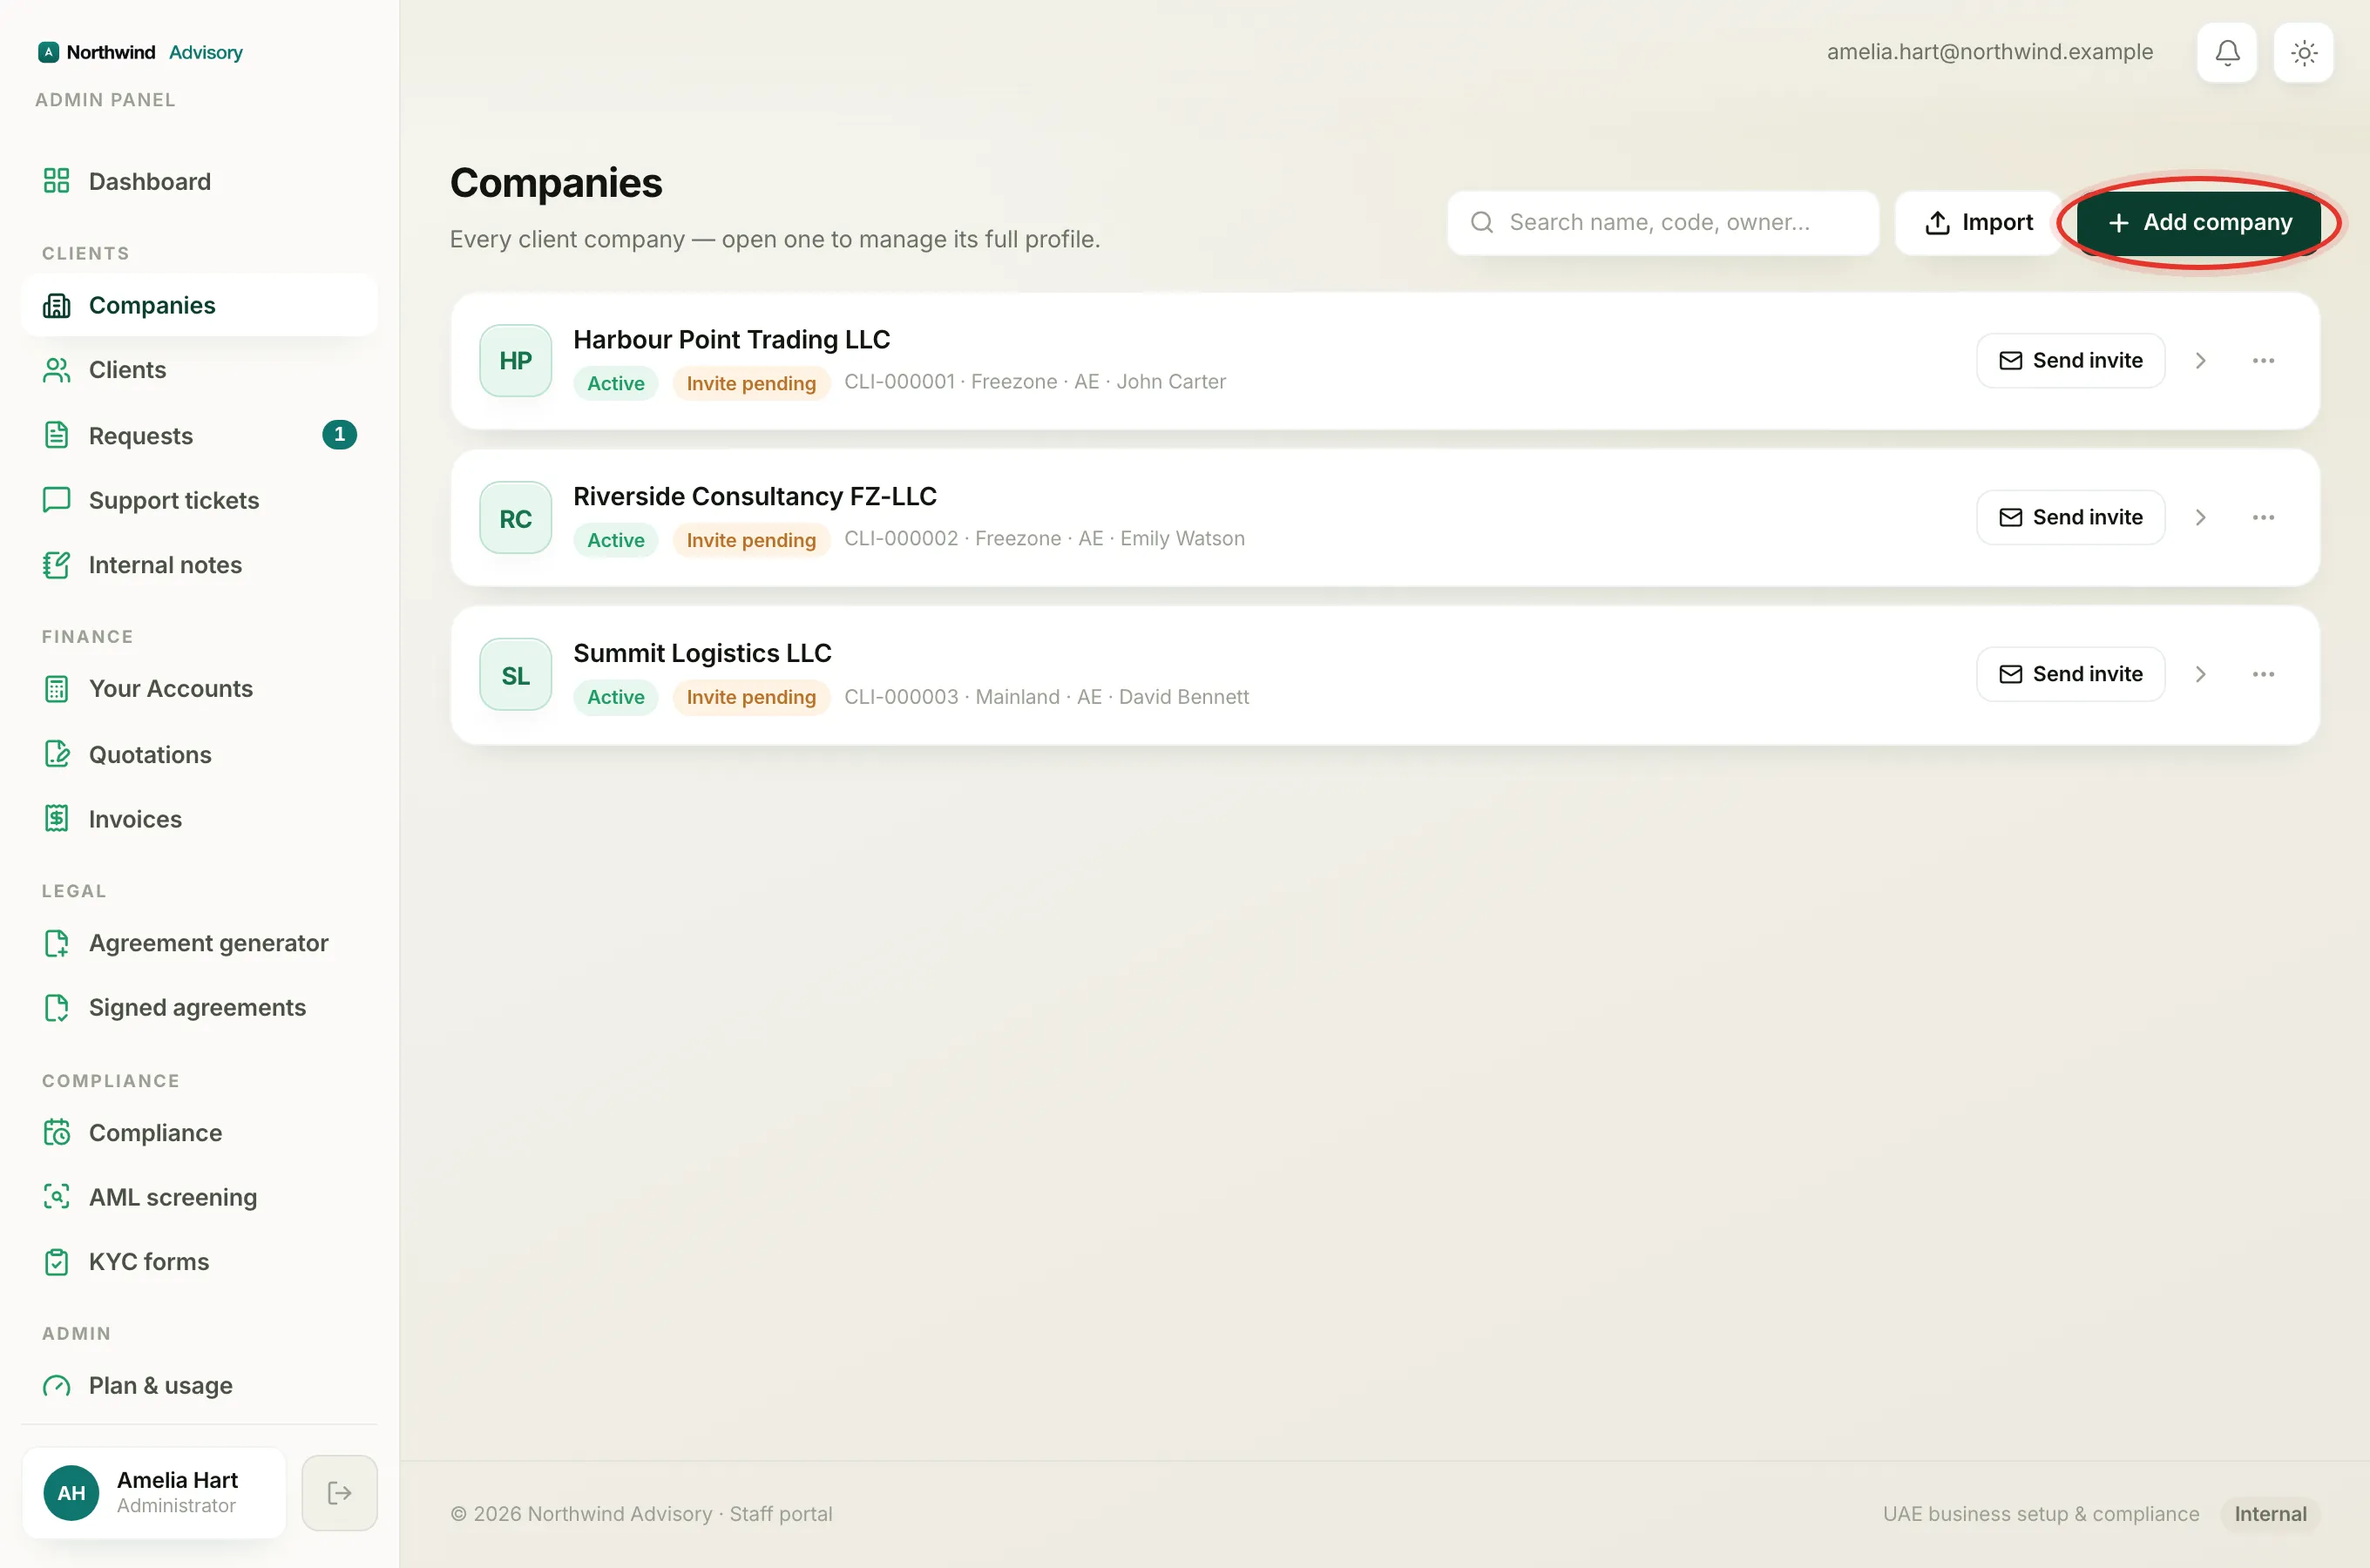
- Log in to your workspace.
- In the left menu, under Clients, click Companies.
- In the top right, click Add company.
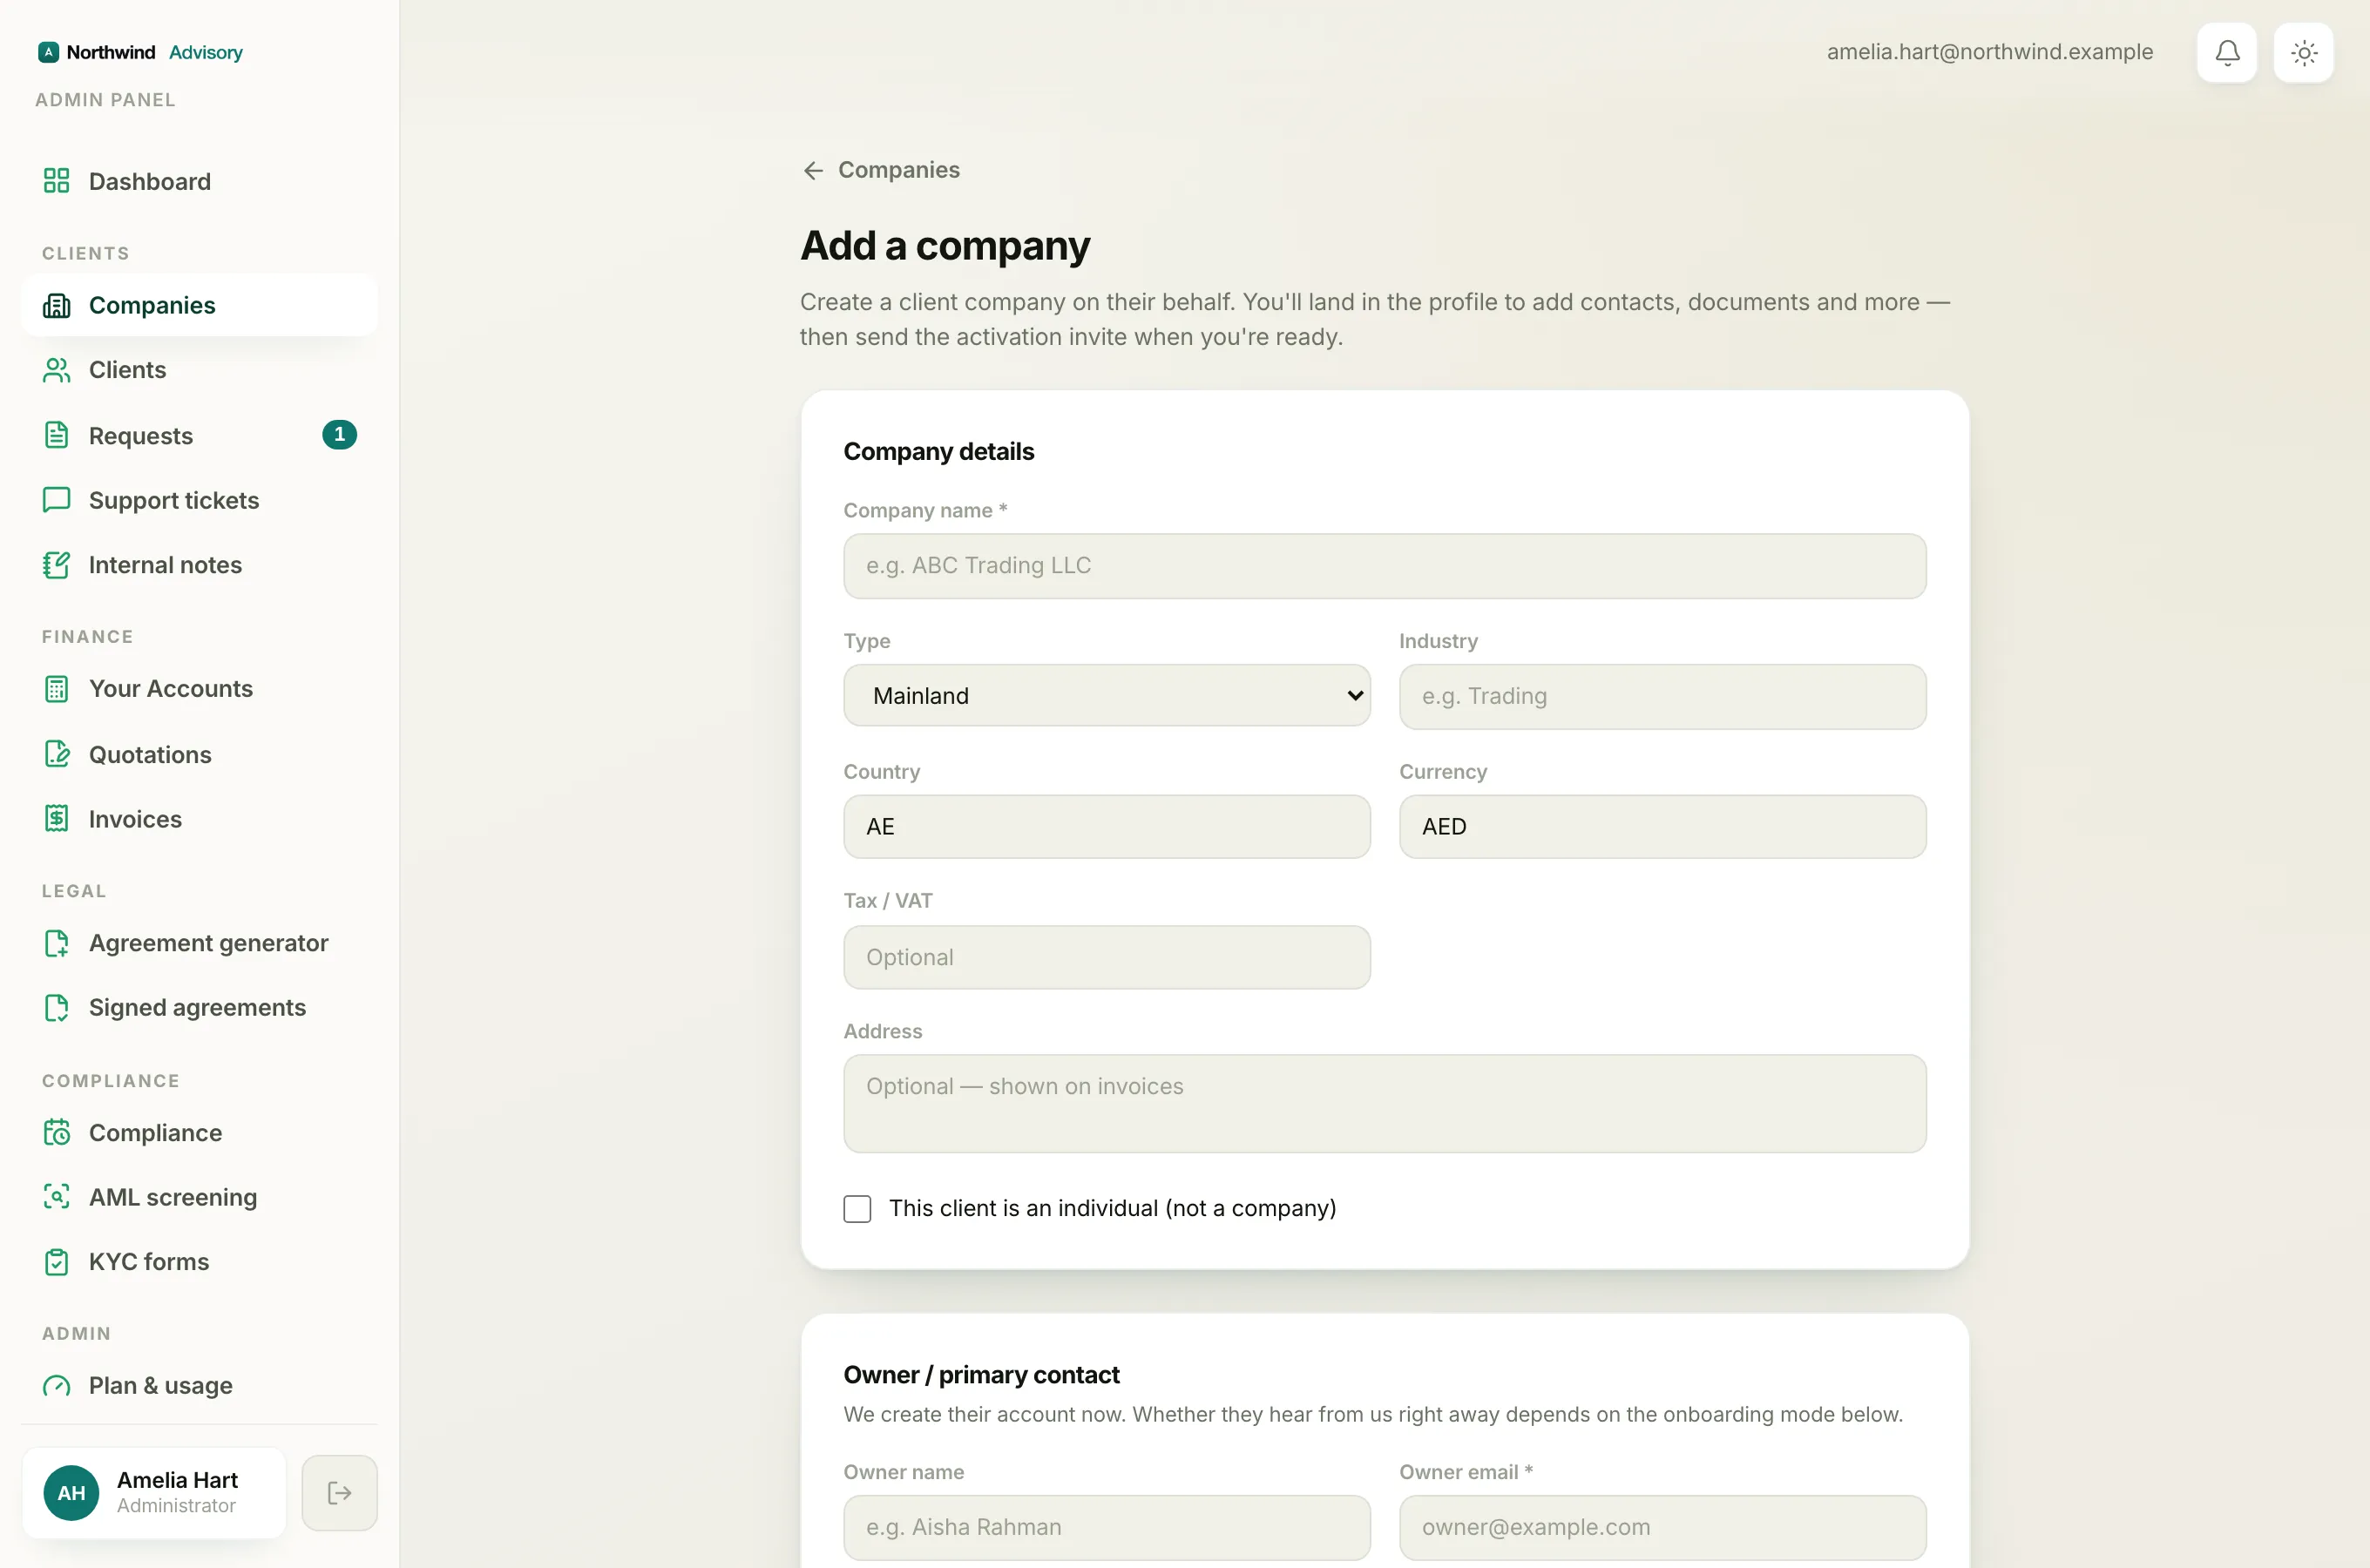
- You are now on the Add a company page. Fill in the Company details:
- Company name is required. Type the full legal name, for example ABC Trading LLC.
- Industry, Country, Currency, and the tax number field are optional. Country and Currency are already filled with your firm's own country and currency, which you can change.
- Address is optional. If you add it, it shows as the "Bill To" on invoices.
- If this client is a person and not a company, tick This client is an individual (not a company).
Important
The Currency you pick here is the currency you will bill this client in. Every invoice and quotation you raise for them is locked to it, so their billing stays in one currency. Pick the currency the client pays you in. See Bill a client in their own currency.
Note
The tax number field is labelled for the client's country, for example TRN in the UAE, GSTIN in India, or VAT number in the UK. If your firm offers company setup, you will also see a Type field for Mainland, Freezone, or Offshore.
Tip
You can leave the optional fields blank for now and fill them in later. See How to edit a company's details.
Add the owner
- Scroll to the Owner / primary contact section.
- Fill in the details:
- Owner name is optional.
- Owner email is required. This becomes the owner's sign-in email for their client portal.
- Owner mobile is optional.
Choose the onboarding mode
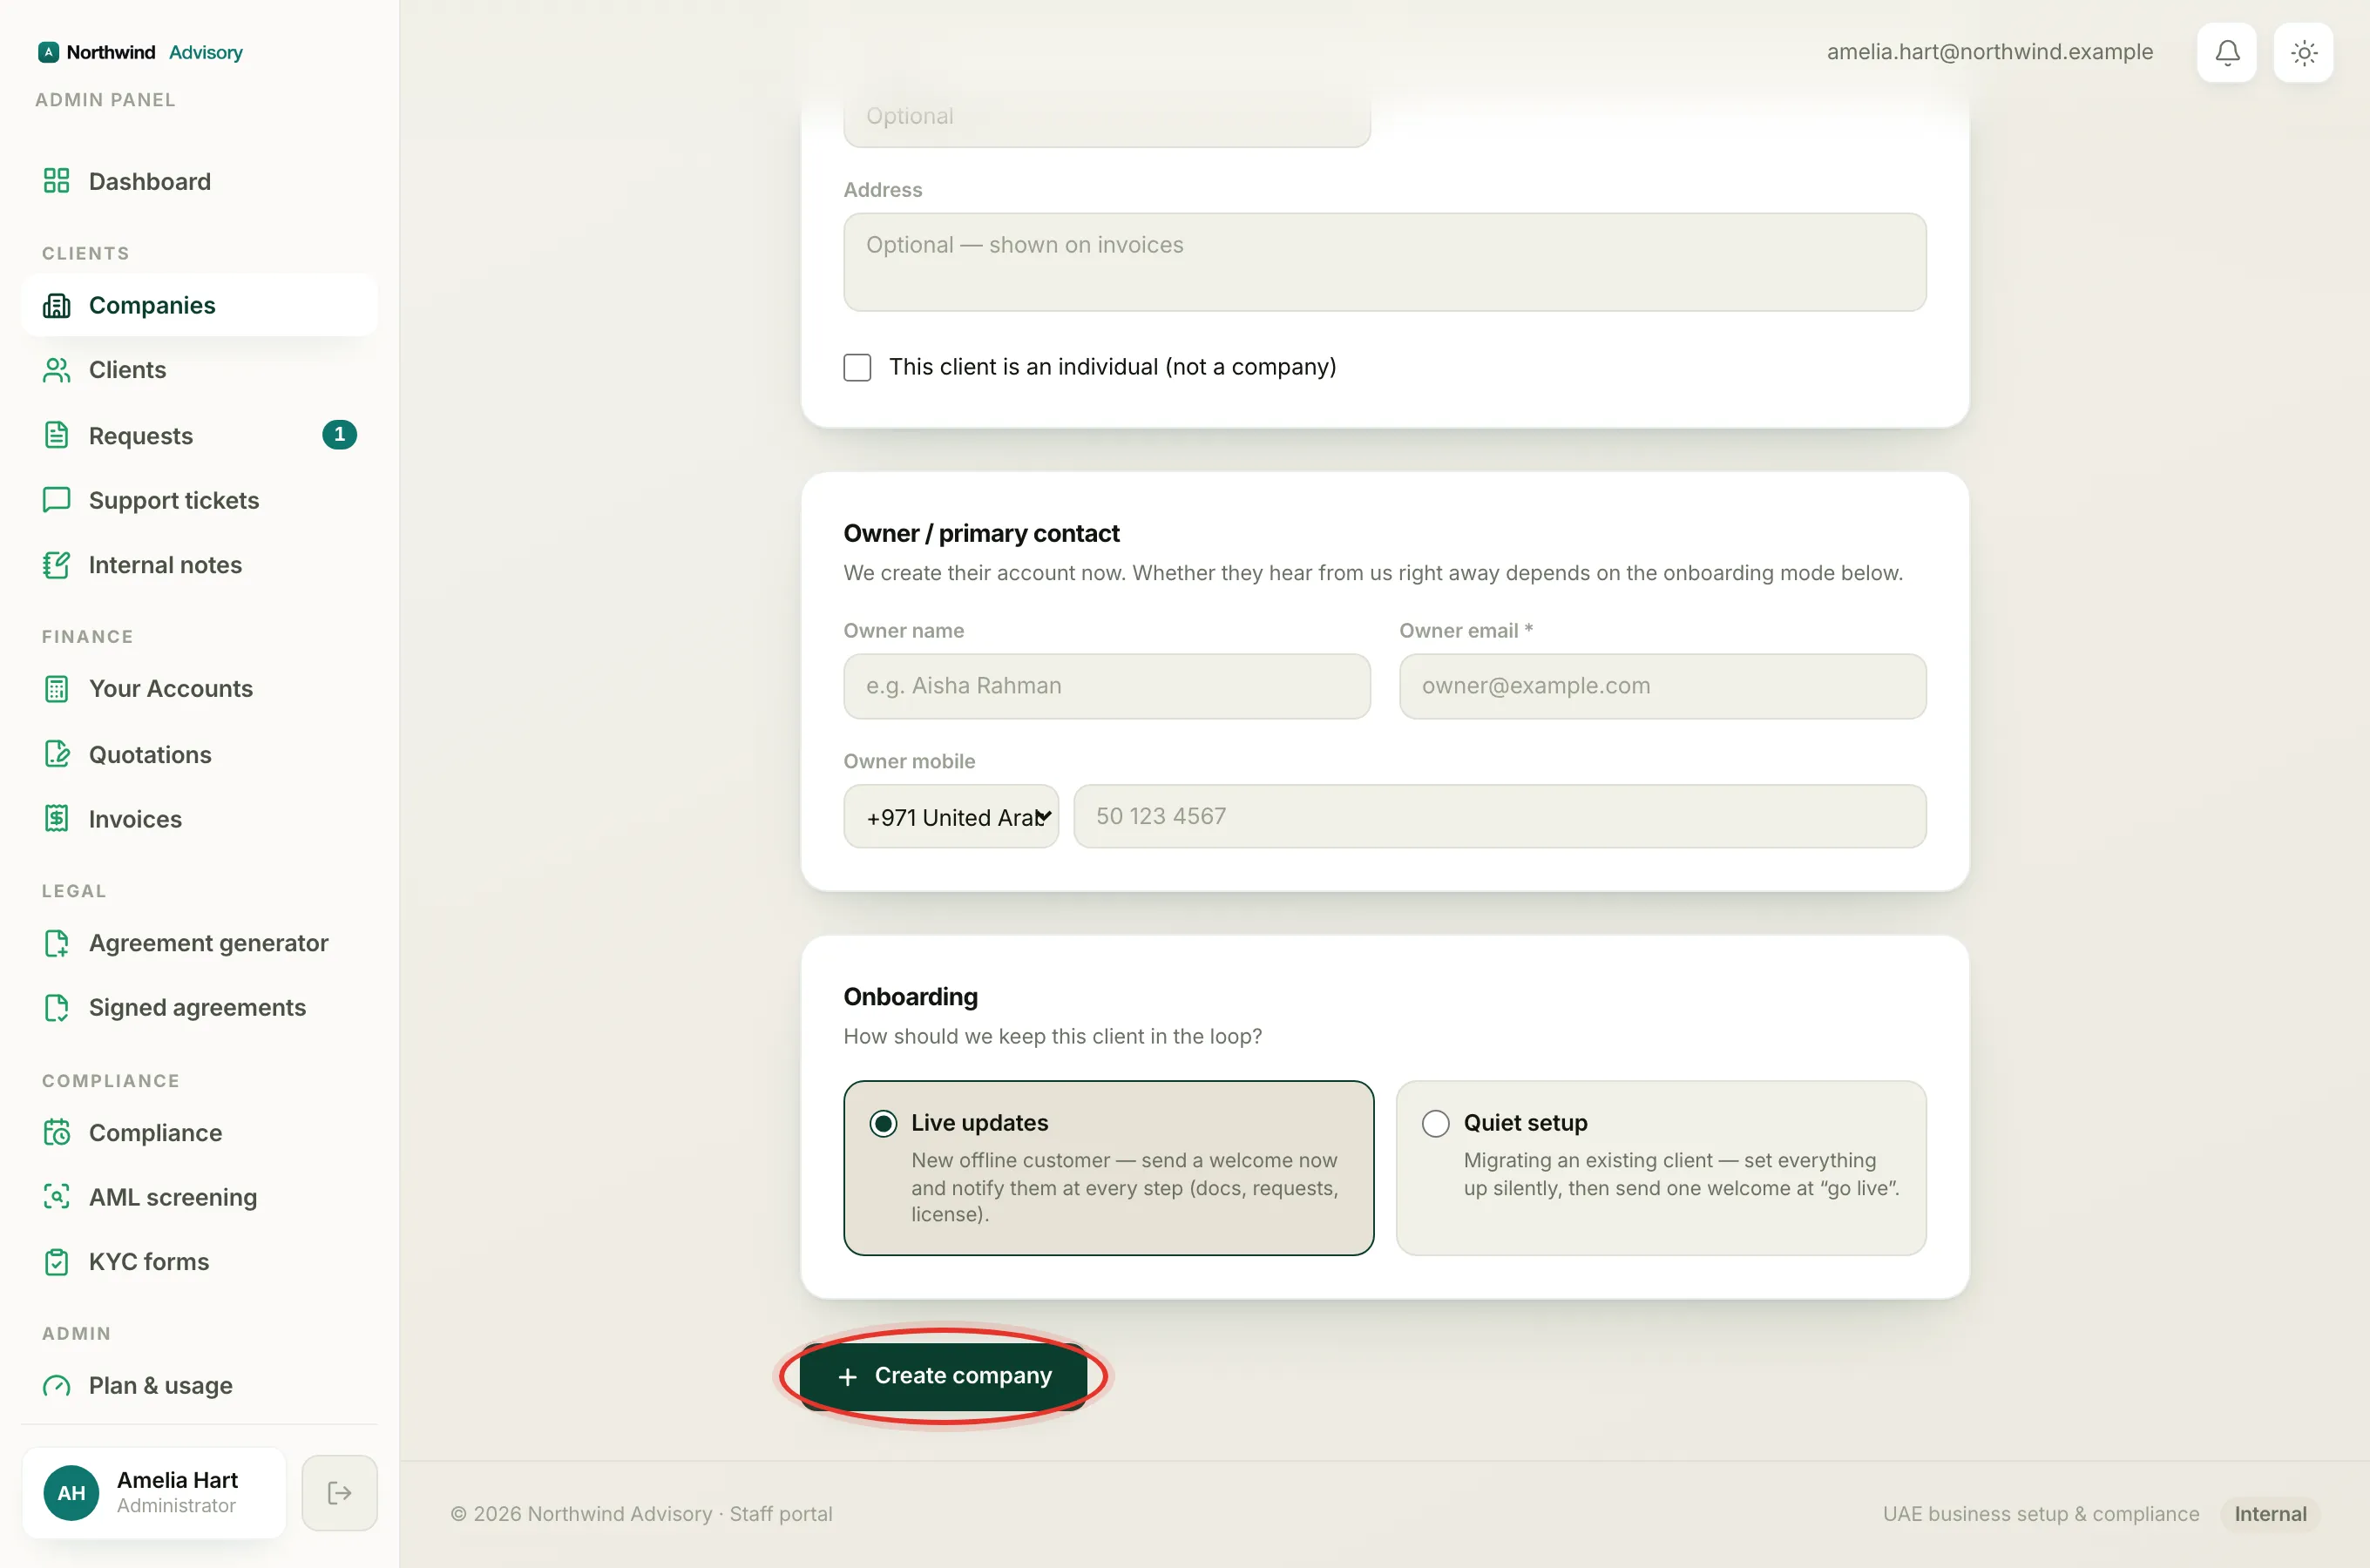
- Scroll to the Onboarding section and pick one:
- Live updates sends the client a welcome now and keeps them informed at every step. Use this for a brand new client.
- Quiet setup sets everything up silently, with no emails, until you are ready to go live. Use this when you are moving an existing client across.
- When everything looks right, click Create company.
You land on the new company's profile page. A banner reads Company created, account not activated yet until the owner claims their login.
Send the owner their login
If you chose Quiet setup, or you want to invite the owner later, you can send the activation invite when you are ready. See How to invite a client.
What to do next
- See everything about this client at a glance. See The client overview dashboard.
- Add more people linked to the company. See How to manage a company's contacts.
- Raise their first bill. See How to create an invoice.