You can let clients pay your invoices online by card, so the money lands in your own account and the invoice is marked paid for you. You do this by connecting a payment provider. This guide walks you through it from login.
Open the Payments settings
- Log in to your workspace.
- In the left menu, under Admin, click Payments.
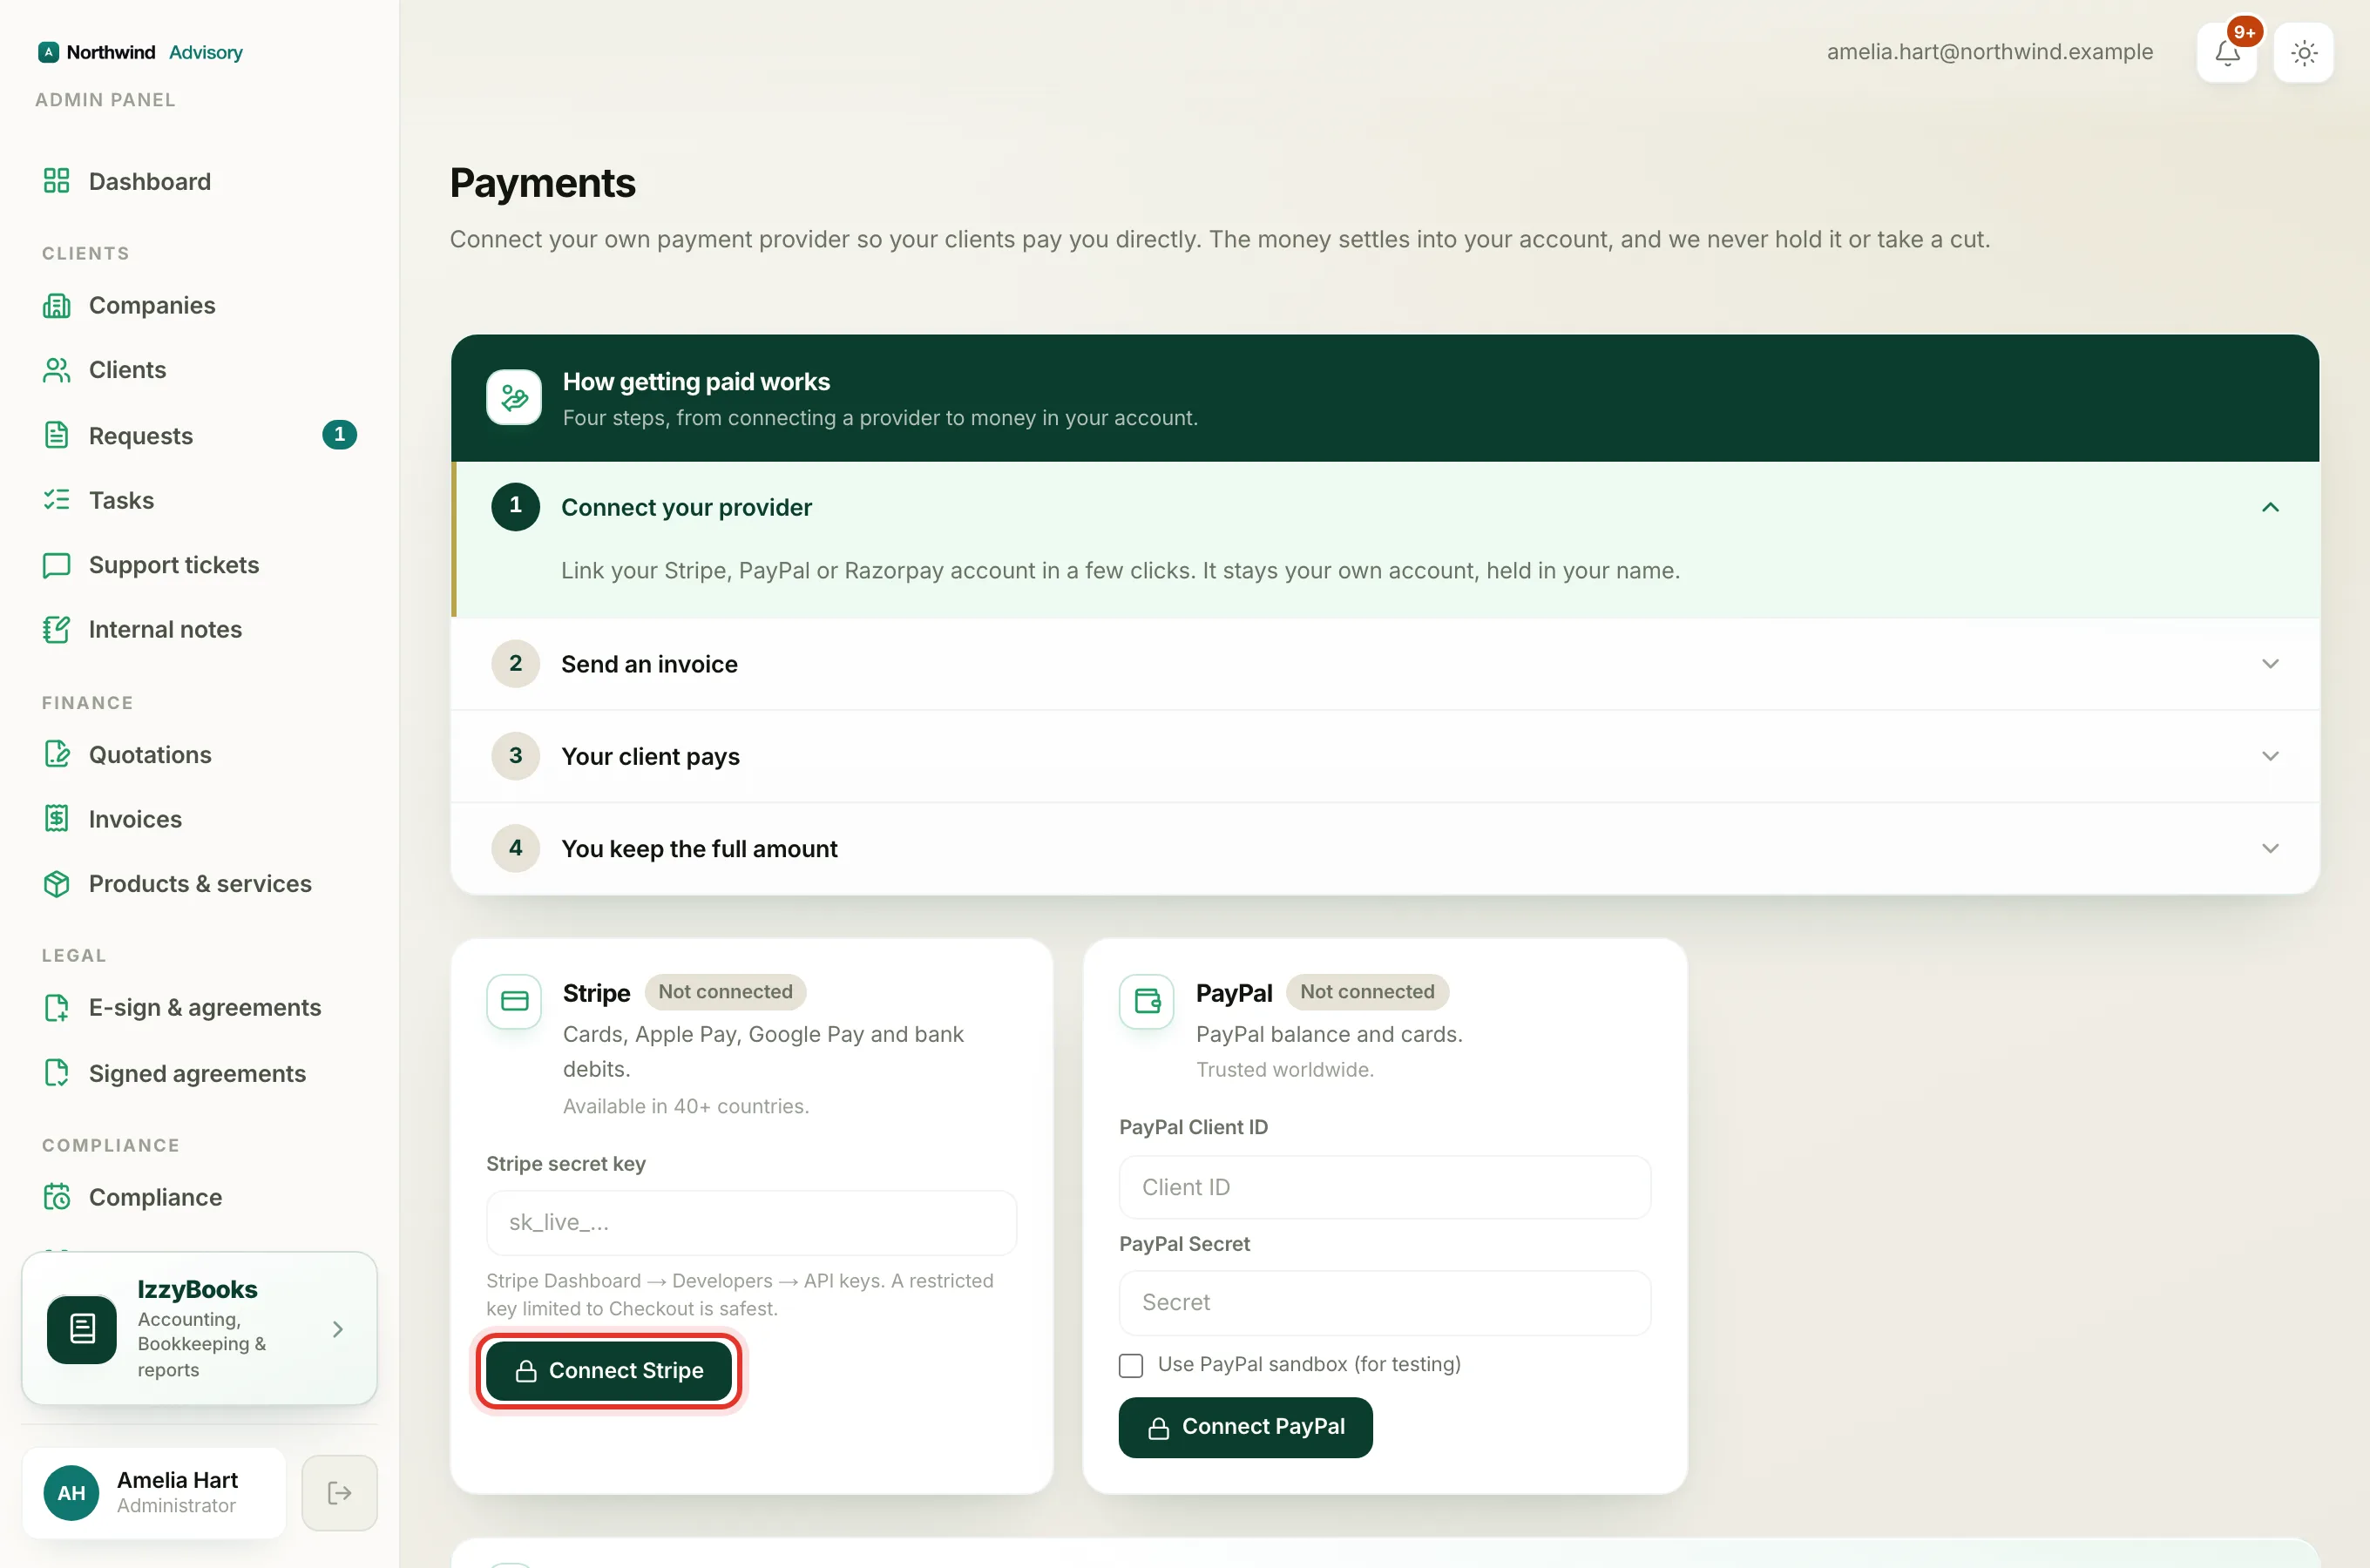
Under Connect your provider you see three choices:
- Stripe, for cards, Apple Pay, Google Pay and bank debits. Trusted worldwide.
- PayPal, for PayPal balance and cards. Available in many countries.
- Razorpay, built for India.
Each shows Not connected until you set it up.
Connect a provider
You connect a provider with the keys from your own account with them.
- Sign in to your provider's own website (Stripe, PayPal or Razorpay) in a separate tab.
- Find your API keys in their dashboard.
- Back in Payments, click Connect on that provider.
- Paste the keys into the fields shown, then click Save new keys.
- If you have more than one provider connected, click Make default on the one you want to use for new invoices.
It now reads Connected.
Important
Your keys are your own credentials with your provider. Keep the secret key private, and only ever paste it into this Payments page, never anywhere else. If you use a test or sandbox mode with your provider, tick the sandbox option so test payments are kept separate.
What your client sees
Once a provider is connected, every invoice you send carries a Pay button. The client pays in a few clicks, the money reaches your account, and the invoice is marked paid automatically. You keep the full amount, less your provider's own fees.
Prefer to take payments by hand?
You do not have to connect a provider. You can keep taking payments your own way, for example by bank transfer, and record each one with Mark as paid on the invoice. See How to record a payment.